Alrighty....so....what do we need to get started? The very basic, essentials, must-haves?
Number one on the list is going to have to be, yeah, you guessed it, CLAY!
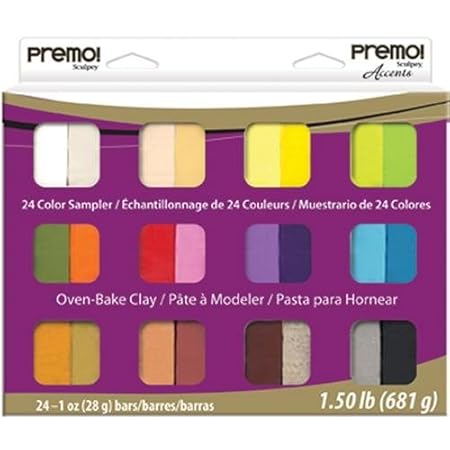
What to buy: CLAY
There are a lot of different brands available, all with different properties.
These websites have a good description of everything that is out there...and both conclude that Premo! Sculpey is the best one out there.
Where To Buy:
The picture above goes to Amazon. Amazon has been my go-to place for most of my supplies. But you can also get it at Michaels, Hobby Lobby, JoAnn, etsy, eBay, and any other art and craft shop.
-------------------------------------------------------------------------------------------------------
What to buy: Work Surface
My teacher, Eriko Page, recommends a ceramic tile. A white one. These are easily available at home improvement stores such as Home Depot, Lowes, etc.
One other recommendation I have seen is a sheet of glass with sanded edges. This helps when you want to do image transfers. But for now, I think I will go with ceramic tile.
Another essential is notecards. These need to be blank, unlined. These are to be used for when you need a non-stick work surface, like then cutting canes, laying out pieces you have already worked on and are waiting for baking. It is also needed for placing in the oven.
Another essential is notecards. These need to be blank, unlined. These are to be used for when you need a non-stick work surface, like then cutting canes, laying out pieces you have already worked on and are waiting for baking. It is also needed for placing in the oven.
Where To Buy:
Tile: Home improvement stores
Card stock: Dollar store, Walmart, Office supplies store, etc
-------------------------------------------------------------------------------------------------------
What To Buy: Rolling Tools
A pasta machine is highly recommended. It is invaluable for conditioning the clay, flattening it, removing air bubbles, etc. It is not a must, I suppose you could roll it by hand with an acrylic rolling pin. Since rolling out anything is not my passion, I will definitely be buying a pasta machine. In fact, Amazon just sent me an email that this is on its way :-)
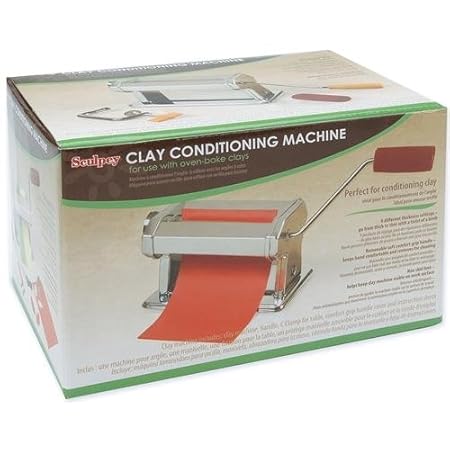
Acrylic or Glass Rolling Pins are also recommended, but I am not sure where to buy them. I bet Amazon has it, will get it if I really need it.
Where To Buy:
Amazon or any kitchen appliances store. I thought Michaels had it, but when I went there, they had no idea what I was talking about. JoAnn has it as well, but the one I got on Amazon (click on the pic above) is the best price I found. You could even check your local craigslist or garage sales!
Cutting, Shaping and Piercing Tools:
I bought a tissue blade, which is a must, from my teacher. This will be used for cutting logs and canes.
An exacto knife helps while carving. I bet there are other cutting tools, but these should be good to start with.
A wide variety of clay shaping tools are available. I like this set available on Amazon.
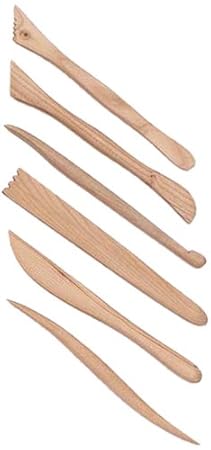
Not quite sure what they will be used for yet, but we will find out soon :-)
And lastly, piercing tools. The tool set I bought from my teacher included a bead reamer. Which is very good, but I am thinking not quite an essential. You could use just about anything to do the piercing. Here are some suggestions I read in my book: sewing and darning needles for piercing, large tapestry and wool needles for smoothing and sculpting, dried up ballpoint pen refill for making larger holes.
Where to buy: Amazon, Michaels, JoAnn, any other craft store
-------------------------------------------------------------------------------------------------------
Where To Buy:
Amazon or any kitchen appliances store. I thought Michaels had it, but when I went there, they had no idea what I was talking about. JoAnn has it as well, but the one I got on Amazon (click on the pic above) is the best price I found. You could even check your local craigslist or garage sales!
-------------------------------------------------------------------------------------------------------
Cutting, Shaping and Piercing Tools:
I bought a tissue blade, which is a must, from my teacher. This will be used for cutting logs and canes.
An exacto knife helps while carving. I bet there are other cutting tools, but these should be good to start with.
A wide variety of clay shaping tools are available. I like this set available on Amazon.
Not quite sure what they will be used for yet, but we will find out soon :-)
And lastly, piercing tools. The tool set I bought from my teacher included a bead reamer. Which is very good, but I am thinking not quite an essential. You could use just about anything to do the piercing. Here are some suggestions I read in my book: sewing and darning needles for piercing, large tapestry and wool needles for smoothing and sculpting, dried up ballpoint pen refill for making larger holes.
Where to buy: Amazon, Michaels, JoAnn, any other craft store
-------------------------------------------------------------------------------------------------------
What To Buy: Cleaning and Storage
A box of baby wipes is what my teacher recommends. Always clean your work surface and your hands before handling your clay.
For storage, she recommends wrapping the clay in wax paper and storing in airtight containers. NEVER wrap in regular paper, or anything porous, it will suck up the "plasticity" of the clay.
One of the books mentioned that some types of clay react with plastic so it is safer to store in tin containers, but I think as long as they are properly wrapped in wax paper, you are good.
Where to Buy:
Grocery stores :-)
-------------------------------------------------------------------------------------------------------
What To Buy: Toaster Oven
Now this is the most debatable one. To buy or not to buy. I had about 50% folks say a toaster oven is necessary, and the other half say its not. So it really does boil down to a personal decision.
What did I decide: I decided to use my regular kitchen oven...for the following reasons:
- I have heard, the bigger the oven, the better the distribution of heat, and hence, better baking
- Very minimal chance of burning
- I don't have space in the house for yet another appliance
- I actually don't use my kitchen oven that much
Place lots of paper on a cookie sheet...make sure nothing is printed on it! Or you can use printed paper and then a layer of card stock on which you will place your items to be baked.
Cover it with a foil pan, and hold it together with binder clips. This is good enough to contain the smells!
Where to buy:
I looked up craigslist for the toaster oven and did find some good new-in-box deals. That could be a good source if you decide to buy one.
Foil pan and binder clips: Just about anywhere :-)
-------------------------------------------------------------------------------------------------------
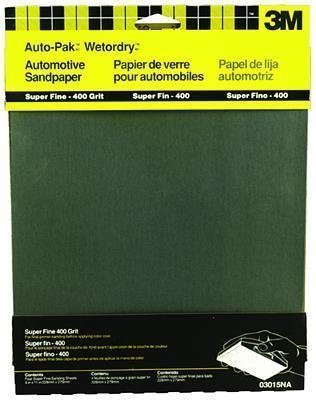
What To Buy: Sanding Material
The final "essential" step after baking is sanding.
You definitely want to "wet-sand" your beads! Meaning get the bead wet and then sand them.
I got two recommendations for the sanding material:
Sand paper: We need to start with coarse grit and then go down to finer. The most recommended sizes are 400/600/800/1000/1500/2000
You definitely want the "Wet/Dry" kind. These are available in auto shops, and also on, yes, Amazon!
I got these two assorted packs:
This first one has 1000, 1500, 2000 and 2500 grits
This first one has 1000, 1500, 2000 and 2500 grits
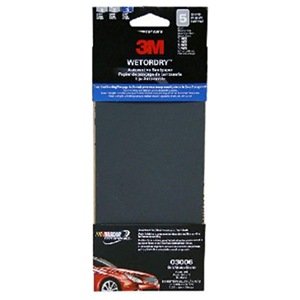
And this one with 220, 400, 800 and 1000 grit
The other recommendation I got, and I bet this works much better for the beads are these: Micro Mesh Soft Touch Sanding Pads! The name itself sounds so good :)
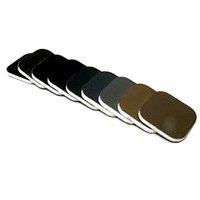
Much nicer, and unfortunately, more expensive :( I will get these once I get better at making beads!
Where To Buy: Amazon, Auto Shops
This last one is a bit advanced...
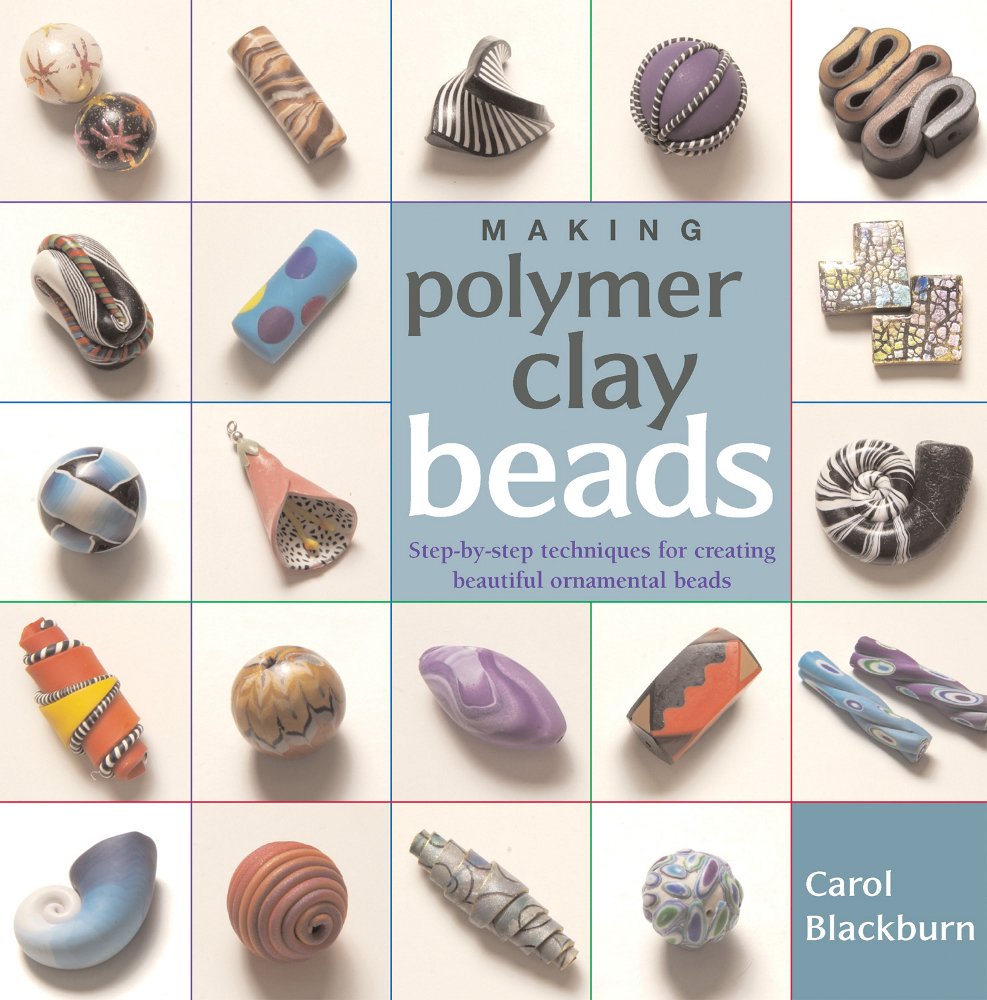
And finally, the book I have been referencing for writing up this post:
-------------------------------------------------------------------------------------------------------
Much nicer, and unfortunately, more expensive :( I will get these once I get better at making beads!
Where To Buy: Amazon, Auto Shops
-------------------------------------------------------------------------------------------------------
What To Buy: Buffing Tools
You don't really need to buy these. You can simply use your old denim to buff up your beads :-)
-------------------------------------------------------------------------------------------------------
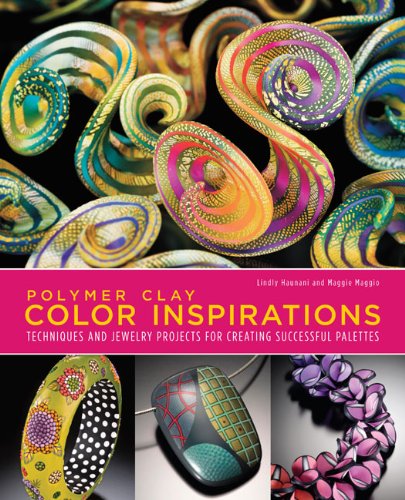
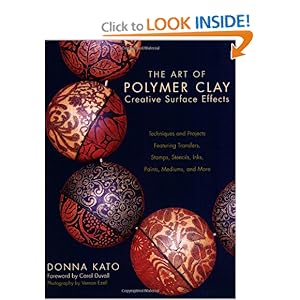
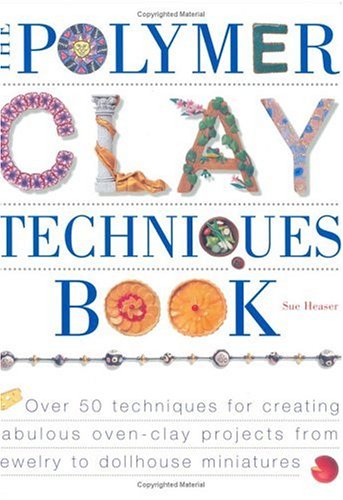
Books and Resources:
These are recommendations I got from Marlene, I need to check these out SOON!
This last one is a bit advanced...
And finally, the book I have been referencing for writing up this post:
-------------------------------------------------------------------------------------------------------
And lastly, the EXPERTS! (in no particular order)
Marlene Cupo of Amazing Designs
Emma Todd of A Polymer Penchant
Lisa Caryl of West Street Studios (one of the very few friends I have actually met in person! Need to get her blog/shop address)
All of them have been guiding me (enabling me, lol) ever since I decided I wanted to do this! Thanks for holding my hand, ladies! You rock!!!
Some Michaels stores carry the pasta maker..Hobby Lobby ( at least the one in my neighborhood ) has the pasta machine, oven and the best price on the clay.I have also seen the acrylic roller there as well. I bought an acrylic brayer ( for ink ) when I started to teach myself metal clay. That works well for the metal clay so should work well for polymer. I got it at Dick Blick Arts and Crafts. DB is online too. JoAnns has the pasta and oven as well. Michaels and JoAnne will take each others coupons and I think Hobby Lobby's....HL will only take there own coupon :(
ReplyDeleteThanks Valerie!! I didn't know Michaels and JoAnn accepted other coupons! We don't have HL here, so I don't feel so bad about it ;)
DeleteI will be on the lookout for the roller and more clay!
I think you girls will have lots of fun with your projects. PC is just like any artistic medium, the more you work in it, the easier it will be to get the effect you want.
ReplyDeleteKashmira, I agree with your choice of Premo for those just beginning in PC, for three reasons: it is relatively soft, it comes in a wide range of pre-mixed colours, and it is widely available (at least in North America). I work 95% in Kato for a variety of reasons, but I keep some Premo on hand for certain techniques. I wish you all good fun in your group project!
Thanks Mon! What I heard about Kato is that its really hard to work with! I guess we are not there yet...softer ones to start with like you said :)
DeleteWhen your instructor mention wax paper, I think she must have meant deli paper. Regular wax paper has too heavy a coating which can react with your clay. Also plastic containers or drawers that have a 2 rating on the bottom (all plastic should be rated) are perfectly safe to store Polymer Clay in. Use them all the time.
ReplyDeleteHmmm...she did say wax paper, and I have a picture of the box she had somewhere. Thanks lot for that tip! Will make sure I buy the right paper and containers!
DeleteGreat tips! Thank you!
ReplyDeleteThanks Kathy :)
DeleteMy hubby had some scrap half-inch and one inch PVC pipe laying around, and cut it into several different lengths for me to use as rolling pins if needed. Loved that idea! Also, I had read somewhere that marking the blades, or making a polymer handle for the dull side of the blades helps to prevent cut hands by knowing which side to pick up. And one question for the experts--- is there a finishing glaze that you recommend, one over the other? Just want to be prepared!! Thank you!!
ReplyDeleteThere are lots of glazes out there, just like brands of clay. Kato glaze is considered to be the "glossiest' and clearest(also the pricest). Sculpey has two glazes, High Gloss, and Satin, which both work well for the "finish" you are looking for. A lot of people sand and buff their creations to a high sheen and don't add anything further, and still others swear by the use of Pledge acrylic Wood Floor Care, which use to be know as Future Finish.
DeleteMarlene,
DeleteI have seen liquid polymer clay being mentioned too. Have you used that?
This comment has been removed by the author.
DeleteNo Kashmira, have never used TLS as a glazing medium. I do have it for other uses.
DeleteGina! That PVC pipe idea is great!!! I want a handy hubby now too, lol :)
DeleteMarlene, hmm...what's TLS again?
DeleteLiquid Polymer Clay, the Sculpey brand.
DeleteTranslucent Liquid Sculpey - the Sculpey brand name.
DeleteI don't have a pasta machine, so I'll have to check into getting one of those and seeing if I can keep up w/you all while you're doing all this. Due to work (my day job) and my jewelry stuff, the only time I have will be weekends and those are getting pretty full w/family and other stuff now that it's fall - so I hope I can at least attempt to try something, but if not, at least I know where I can come to jump in to things when I'm ready and able! Thanks for doing all this Kashmira!
ReplyDeleteShel...that is perfectly fine :) I am just going to put up what I did every week, what I learned from it, and what's next. Whoever can follow is good :) Not doing sign-ups or asking for any sort of commitment since this is one loooooong project!
DeleteThis comment has been removed by a blog administrator.
ReplyDeleteThis comment has been removed by a blog administrator.
ReplyDeleteThis is awesome, Kashmira! I've been out of the loop for most of the summer and wish I could participate, but maybe I can catch up this Fall.
ReplyDeleteWill be awesome to have you join in when you can :) I love your work!
DeleteI think I will wait on the pasta machine until I see how much I play with clay first. I have an acrylic roller thing that I got in a SB kit one time that works perfect for rolling out clay. The last time I played with clay I used the oven bags to put my tray in and then sealed it up so no fumes. I had read about that somewhere and loved the idea.
ReplyDeleteI just watched a demo the other day and they mentioned using clear nail polish to coat the beads. I thought I had heard recently not to use that as it made the clay sticky but maybe I'm thinking of something else. I may have to buy a new bottle of floor polish as I think mine is pretty old. Think I bought it for something else crafty. LOL
Can't wait to get started.
I was wondering about the acrylic roller vs pasta machine too...but then gave in for the pasta machine. Am kinda lazy that way ;) I saw how quickly the teacher conditioned her clay and was sold! I believe its also quite helpful while making skinner blends. But of course, that's much farther down the road for us!
DeleteI read about the oven bag idea as well...but err...didn't know what that was at all since I don't bake at all! Then someone suggested the foil pan, and that just worked out (told ya, I am lazy!)
Wonderful start! I am not picky about my polymer being stored in airtight containers since it doesn't dry out. More important that it be covered. For instance I have some sitting on what amounts to a covered shelf, for years, dust follows gravity, unless you interrupt so as long as it's covered it's good, in my books. I had a few other ideas to piggyback too, ones from my experience, that you likely won't see in the books :) http://apolymerpenchant.blogspot.ca/2013/08/if-you-ever-wanted-to-get-started-with.html
ReplyDeleteThanks SO much for this, Emma! Little things make all the difference!
DeleteWell, cool beans... I've got everything and am ready to go!
ReplyDeleteHuge box of clay - check! (I have both Sculpey III and Premo - and from some of the reading and teaching I've received, Premo is definitely the clay of choice so the Sculpey III is in a bag somewhere - maybe I'll let my son play with that when he's older... lol)
Ceramic Tile - check! (Bought mine at Home Depot or Lowe's - can't quite remember which - and it was in their individual ceramic tile section and cost me all of, wait for it... $1.00! Yup, a buck and I had myself a nice large ceramic tile work surface!)
Pasta Machine - check! (Thought I could get by without one... Once I got one I wondered how I survived without it! It just makes this a whole lot easier. Just about any craft store should have this right where they have their Polymer Clay)
Cutting, Shaping and Piercing Tools - check! (I have tissue blades, bevel edge cutters, shaped cutters in all different shapes, and other tools like exacto knives and stuff like that. Toothpicks are another thing you can use to make the holes in your beads...)
Cleaning and Storage - eh kinda check... (I just store my clay in zip lock baggies with as much of the air removed as possible and so far so good... Cleaning is just normal soap and water at the sink, however, I do have dedicated towels that I use for Polymer Clay use only.)
Baking - I simply use my own oven as I've often heard bad things about toaster ovens not baking evenly, burning, etc... so I'd rather just use my own. Now, if I were popping them out en mass all the time, then yes, I would look into something dedicated. But, a few at a time... shouldn't be a problem. And what you could do is bake them at night right before you go to bed, turn the oven off after the recommended time and leave them in the oven until morning. Most of the fumes should be gone by then...
Sanding Material - I just have some 400 and 800 wet/dry sand paper from the automotive store. When talking to my father-in-law (may he rest in peace) he told me that anything over 800 and you really are just wasting your time, you don't need to go any finer grit that that. Now, there are some that have an opposing view and that's okay. I'm going with what he told me as I trust his wisdom. He was a master wood worker and also worked with jewelry in different mediums over the years. The man knew the science behind things like that, so I trusted he knew what he was talking about when I told him what I was doing and what its purpose was. So, for the rough grit, I went with 400 (because I could not find a 300 which was what he recommended starting with) and then the 800 for the finer grit. I think he had said something about, if you are sanding it right, you won't need to go past the 800 grit - going past it will be redundant. He never even used anything past that in his wood working and let me tell you, that was buffed and polished and shined just fine how he did it... (Sorry if that was a little ramblish... I miss my father in law... he just passed away a few weeks ago... still kinda raw...)
Buffing tools - check! (I have scraps of old jeans from my son that I cut down into shorts... I also bought some white denim and a really soft material in white, but can't quite remember what it was - not fleece... oh, flannel, that's what it was! Dang brain...)
Books - I only have one book on polymer clay and it's okay... but... I really want to get more that are dedicated to making beads... I also use Cindy Lietz's tutorials and beginning class to learn.
Really looking forward to this!!! Thank you for putting this all together, Kashmira!
Thanks Kelly!!! This is all really good insight into what works!
DeleteKelli, don't give up on that Sculpey III, it is firmer to condition than Premo (which is my choice for most things) but it can be a better choice for detailed canes, with high definition, down the road, due to that firmness.
DeleteI have a pasta machine that I bought at a yard sale. It is an actual PASTA MAKING MACHINE. As far as I can tell they are the same as the ones sold in hobby stores, and I think the kitchen ones are cheaper. Just a thought. Of course, once I used it for PC, I never used it for pasta! I'm fine getting that from a box!
ReplyDeleteI have most of the basics already, except my tile is pink. I'm good!
Re the tile, does it have to be white?
ReplyDeletep.s. I also have a box full of card stock but they are colored. . . . do you think it matters?
ReplyDeleteJust found your post and I'm up for joining! Had some polymer clay in the attic I'd never got around to using so I'd love to learn along with you all.
ReplyDeleteHi Pam!
DeleteThanks for visiting and as you may have noticed, I kinda fell off the face of the earth :( Am back now, and hope to pick this thread up again...glad you can join!